Sunday, October 9, 2016

What the *bleep* is Undertale?!


That was the exact thought that passed through my head when the youngest announced that in early September that was theme he wanted for his upcoming birthday party (well...maybe not that EXACT thought...I didn't bleep myself). After that was..."Crap! Now I'm RESEARCHING party themes?! WTH?!"


Anyway, apparently Undertale is a game on Steam (if you are a parent of older kids..yeah, you've probably encountered Steam aka: bugged the heck out of to play on and buy from). It is about a little boy who "has fallen into the Underground, a large, secluded region underneath the surface of the Earth, separated by a magic barrier. The player meets various monsters during a quest to return to the surface"...blah, blah, blah... 


Alrighty then..so here we go for all those poor shmoes (parents) who need help with your own Undertale themed birthday party here's what went down:
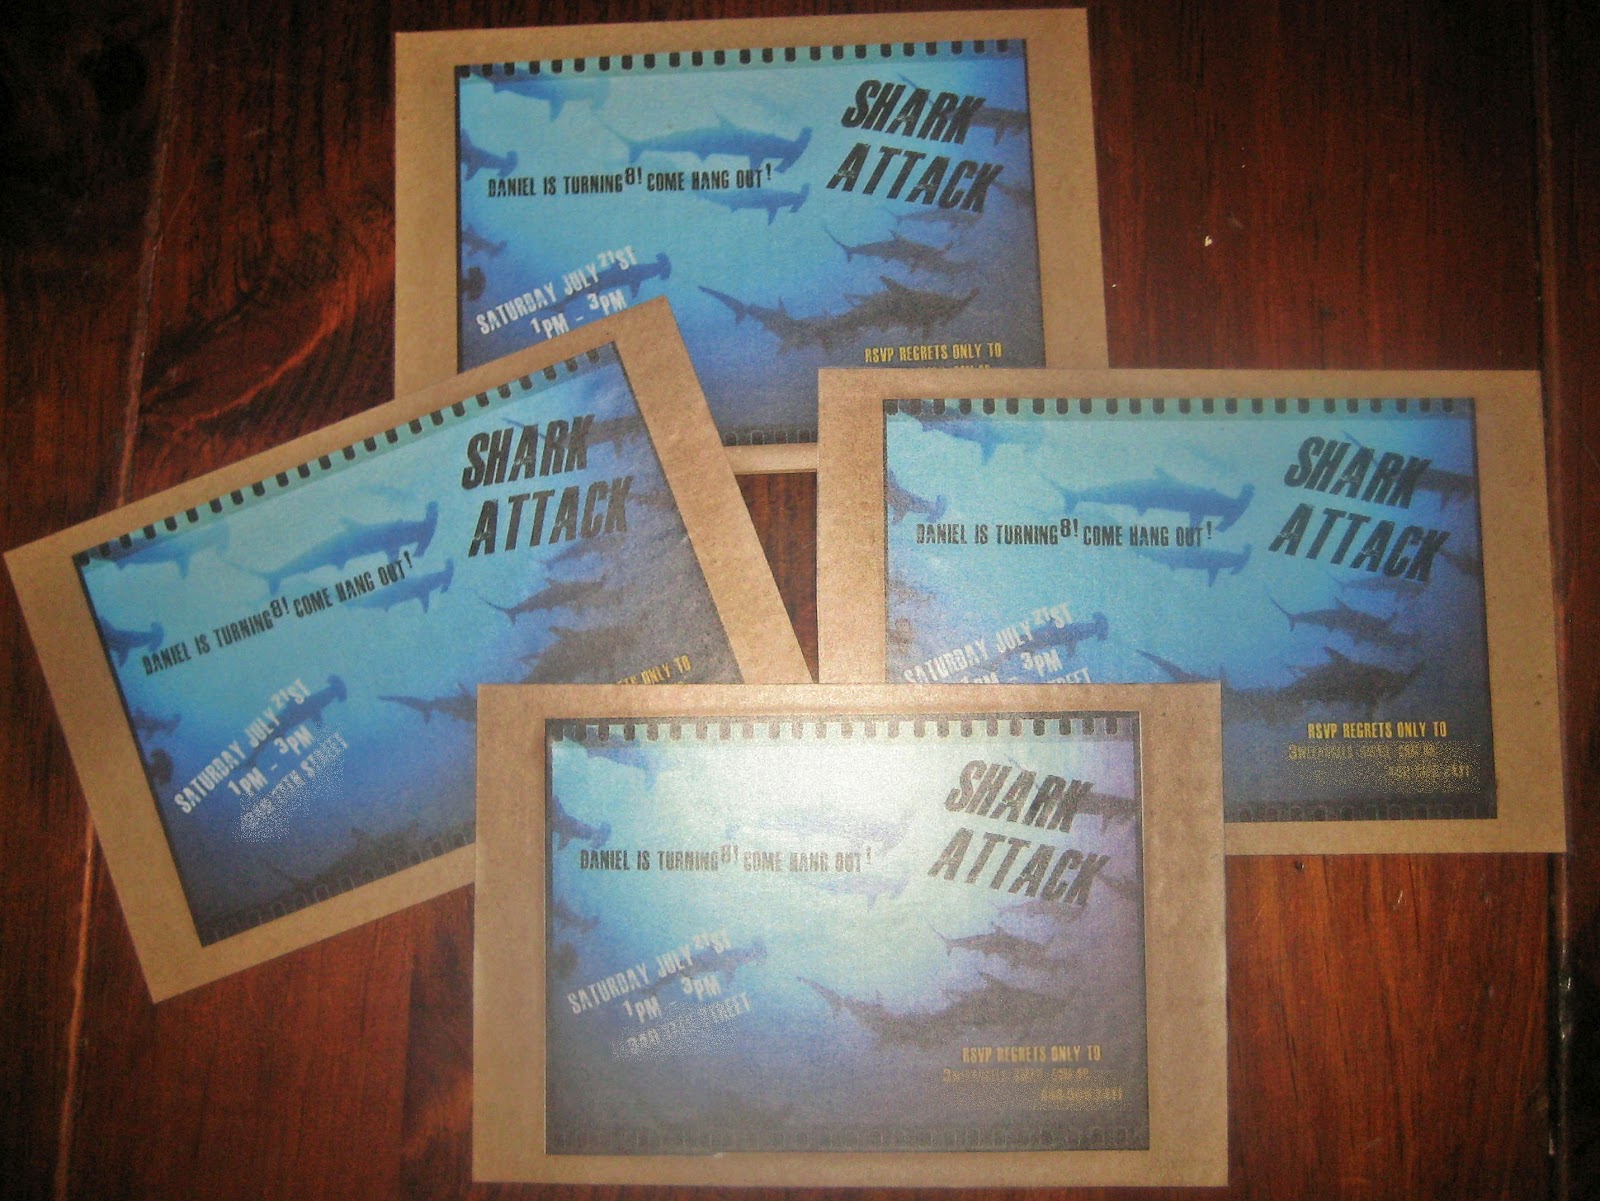


The Invitations
The invitations were made using images found during my search, printed on cardstock, laminated and then I used a hole punch and placed a ribbon through the top to create "laynards".
Decorations


The decorations were kept to a minimum since really at this age kids only care about the food and playing. Again, using images found on the Internet I drew two of the characters on poster board, colored in and eventually cut out. Birthday boy's sister made the Floweys and his brother hung them up using green crepe paper for vines. Boom! Done!

 The cake was taken from another Internet find (chocolate cake with buttercream frosting) and the blue flame was created by melting a blue Jolly Rancher for 4 minutes in a 350 degree oven.


"Spaghetti" cupcakes with strawberry jam "spaghetti sauce" and "meatballs", aka Whoppers, were made since Papyrus LOVES to give everyone spaghetti.


For the food we had: popato chisps (potato chips), Ghost fruit (no, I did NOT cut them into ghost shapes, who has time for THAT?!), Hot dogs?( hot dogs with candy eyeballs), crab apples (candy apples), Spider cider (green punch) and abandoned quiche (mini cheese quiche). I made labels for all this Undertale "food" and included their health points.

The poster was made using Block poster online. AWESOME site! Check them out at: http://www.blockposters.com/

So there you have it. Not bad for not knowing what in the frippin' frack Undertale was in the first place. Although...now I DO have a costume idea for myself for next year! I think I will make a fine Muffet! :D

Thursday, June 18, 2015

The Bedroom Makeover Continues

My next project, as mentioned in the previous post, was to make shag rugs for the floor. I took to the Internet once again and came across making shag rugs from remnant pieces of material. After realizing that even with a rotary cutter this would take forever, I got the brilliant (insert eye roll) idea to latch hook my own. "Latch hook?!" you say. Yup! That old (and apparently) dying art from yesteryear.
So, off to the searching for info I went. Now, latch hooking itself is EASY! Even this old woman remembered how to do that. Finding information on how long to CUT the yarn so it would have a "shaggy" effect was NOT easy. Pre-cut yarn would be too short (2.5 inches). FINALLY I came across a site: http://ourtownusa.net/yarnyard/cutrugy.htm I figured that 4" was a good length. 

Deciding on the TYPE of yarn for rugs sent me onto another long search. End result: Wool is best. Acrylic blend is better. But you can get away with simple acrylic (most yarn compositions) if the rug won't have a lot of foot traffic. 

I also opted to cut my own since I didn't know how much I would need. Better to just be able to run to the craft store, rather than have to pay shipping and wait for the mail if I needed more. 
Turns outs 15,120 threads later...I would have done a LOT of waiting.
But to quickly cut this yarn I need something that would cut multiple pieces.
VOILE!!
Small piece of wood with two dowel rods
Yarn wrapped around the dowels


Finished yarn length 4"


I took a scrap of wood, measured 4" apart, drilled holes half way through the scrap wood the diameter of dowels and placed dowels in holes. You can glue them in place at this point, but I wanted to make it portable and able to "break down". Next I wound my yarn around and around and around (not too thick though, I still have to cut it). I made a mark in the middle of the scrap wood between the dowels, held the yarn (still on dowels) and cut. Done! 4" length of lots of yarn!! Now...they are not going to be EXACTLY all 4" but since you will end up having to give the rug a "haircut" at the end it isn't a big deal.


There are also several ways to bind your rug: 1. duct tape (not recommended) 2. rug binding tape or 3. whip stitch with yarn or rug thread (what I did).
For a super plush feel I hooked every rung and doubled the yarn. Yeah, it took longer (3 weeks). The FEEL of it was worth the time though. It's a good sign when the kids come into your room to just WALK on the rug. The rug is 11' x 48". Here's the finished product:
There ya have it! A latch hooked shag rug! One down. 2 left to go!  Any questions, feel free to ask! Hope this inspires you to make your own!

Monday, May 18, 2015

The Bedroom is done...well...ALMOST

Yeah...I am SO not a blogger. Two years since my last post?! Explains why I never kept a diary as a child. Husband said that I should really jot down when I finish all my projects so I can look back on them, hence why I am writing. He's right. There. I said it. ;)

Anyway...this post is about our recently re-done bedroom. Two years ago Hubs and I busted down our old bed frame with the intention of building a platform bed. Aside from the bathroom, our room is the smallest in the house(9x9), so space is at a premium. BUT...24 months later we were still sleeping on a box spring and mattress on the floor. Hrumph!

We started with a NEW mattress. It is heavenly!! It is by Dormeo. BUY one...no seriously, these beds are AWESOME! I digress. Knowing we could not put this bed on the box spring, let alone on the floor, forced us to build that frippin' platform bed. I used Ana White's Twin Storage Captain's Bed woodworking plans. http://ana-white.com/2010/05/twin-storage-captains-bed Check this site out! It has GREAT ideas! The plans are simple and super easy to follow. With the help of my BIL to cut the wood (simple stock pine) and piece it together We had our bed frame! YEA! 


Now, I didn't want stain and I wanted it to look aged. After hours of scouring the internet for ways to achieve that without tons of staining, sanding, waiting...zzzzzz...I opted for the old steel wool in vinegar and then add water. It was quick and easy and gave it a gray/brown color. Here is what I did: 3 steel wool pads, 2 quarts of vinegar. Let it sit for 7 days (the longer it sits the better the color)in a bucket with a lid. Add the same amount of water as you did vinegar. "Paint" on with a foam brush. Let dry. Whew! I know...what a tiring process right? Be forewarned, the wood WILL smell like vinegar for a few days, but WILL dissipate. I promise.

Next came deciding if we wanted a headboard or to cover the wall in fabric. Hubs wanted a headboard. So...I took the idea of the Captain's bed, re-worked it and made the headboard the exact same way. We had to put the side cubbies up off the floor since we have a wall register. Unfortunately we also have lathe and plaster walls and I was worried about them falling. Honestly though, L-brackets (which you can see in the picture and I need to still paint to the wall color) and 52 drywall screws later and that sucker isn't going ANYWHERE! I did get my fabric on the way though. Between the top cubby and side wall cubbies I stapled some quilt batting on the wall, then stapled some fabric over it and finally finished off with some ribbon hot glued on to hide the staples.

The lanterns on the top shelf I found in my parent's garage. I thank my father for being a pack rat. :) I washed them down with some steel wool and vinegar, cleaned the globes, placed battery operated Christmas lights inside and they are now nightlights. LOVE them!
 The little boy and girl neck rolls on the bed I made with 4 towels, 1 yard of fabric and some cording. They are easy to do. Roll up two towels per neck roll, pin. Measure diameter of roll, add 3/8" seam allowance. Make a small pocket for cording on both short ends and sew. Sew large seam together. Snip two spots for cording to go through. Insert towels. Remove pins. Thread cording and tie it. The "appliques" were made using a boy and girl silhouette I found on the internet, reversing the image, applying heat bond to fabric, and cutting out image. Peeled off the back of heat bond, applied fray check and then ironed on. It was WAY cheaper than buying those foam neck rolls.

The shades were done with just some painter's tape and acrylic paint. I REFUSE to give up my darkening shades. Not happening.
So that's where things stand now. I still have 3 rugs to make, pictures to hang and the dresser to re-do, but the MOST important thing is I have a bed!! I am an adult now! Go me! Take that IKEA!

Tuesday, August 6, 2013

Back to School Prayer

Dear Heavenly Father,
       In a few days the children will be starting back to school. Another summer has passed so quickly. It was gone before it was even here. I feel as though I haven't had enough time to do anything I had wanted to do with them, or say to them, or teach them. The end of Summer always reminds me how quickly time passes Lord.
     I feel as if I have been so wrapped in : "Pick that up." "No, you can't have more candy." "Seriously, child we just ate dinner and you are hungry?!" that I have missed so many opportunities Lord. Seems like just yesterday I was praying for them all to be potty trained so I could be "diaper-free" (HALLLUJAH!), and now they are all going to be in school full-time. Stupid diapers.
     I pray, Dear Father, that You are with them, guiding them and supporting them. I pray You help me be the Mom that they need me to be this coming school year. Be with them when I can't Father. Strengthen their knowledge that even during school's "tough" times, You are guiding them and strengthening them. May they not grow into the men and woman I want them to be, but the men and woman You NEED them to be.
     I pray for their teachers Lord. That they may light the fires of learning. That even though they may become frustrated Lord, that they find strength and determination to reach every child and allow them to blossom. May they not be discouraged or unkind. Strengthen them during those hard times. Speak to their hearts.
     I pray for the children's' and their school's safety Dear Lord. That their school be a haven of learning and fun and friendship and safety.
     I know the children are only mine for the blink of an eye Lord. I know they are Yours for eternity. So when I can't be there to protect them while they are at school Lord, I simply ask that You are.
     Thank you for all You have done, all You are doing and all You will do.

     In Your Heavenly Name, Amen.
    

Saturday, December 15, 2012

Forty and Faaaabbbulous!!

True story: The other day I was driving with Gonzo (that would be the littlest Goober) around town running errands. We stopped by a salon to both get our haircut, so whippin' through town in the car I felt... ♪♫fabbbbbbuuulllloooouuusss♫♪. Sitting at a red light, sipping my cold coffee from a cup I had to pour it into because my coffee mug was too large for the cup holder, I got a weird feeling. The kind you get when you know someone is watching you. I glaced over and saw this "cute" younger guy smiling. I smiled back. He smiled wider. Now, yes, I am married but I gotta say it felt PRETTY good to be 40 and still feel like I got "it". That is...until I looked at the cup I was drinking my cold coffee from...our daughter's My Little Pony pink cup. Ahh...well. Coffee was good.☺

Tuesday, July 24, 2012

Shark Attack!!

The eldest child who was turning 8 requested a shark party this year and here are the results:

The postcard invitations were made using Photoscape and free Masterplan font from http://www.fonts.com/ Shark picture was found on the Internet, attached with double stick tape and then clear contact paper was put on top to protect them through the mail.

Signs were taken from an internet search for “shark signs”. I printed them on regular paper, attached with double stick tape onto thick scrapbook paper and attached to dowel rods.

Birthday sign, cupcakes, saltwater taffy and shark kabob ideas taken from: http://celebrationsathomeblog.com/wp-content/uploads/2011/09/shark-party-1.jpg
The cupcake wrappers were made from scrapbook paper in blue water and silver using the template from: http://www.cupcakeproject.com/2010/08/how-to-make-cupcake-wrappers.html

The “surfboards” were cut from scrap wood, decoupaged with shark images found on the Internet and painted with acrylic paint.
Watermelon shark instructions were taken from:http://www.watermelon.org/Carvings/Shark-30.aspx
Adding Barbie was my idea which the birthday boy found hilarious. *giggle*


Favors taken from: http://www.flickr.com I used blueberry, berry blue, cream soda and coconut Jelly Belly jellybeans to fill the inside. Shark squirt toys inside were from http://www.birthdayinabox.com Thank you stickers were made using my Dynex sticker maker. LOVE this little gizmo!! All candy was bought from a local candy warehouse called b.a. sweetie http://sweetiescandy.com/

We served hot dogs, individual chip bags and pickles in hot dog baskets to make everything portable for 8 year old boys. We also had individual soda pop bottles in Tangerine and Lime by Jarrittos. Again...transportable and less likely to tip over than cups.

The cake was chocolate with peanut butter frosting per the birthday boy’s request (tastes like a Reese Peanut Butter Cup) and the cupcakes were vanilla with blueberry buttercream frosting. Per my husband’s idea I used blueberry JELLO to flavor it and YES…it TOTALLY worked. In fact it tasted like blueberry saltwater taffy. YUM!!


If you have any questions on anything you see here feel free to ask and I will help you as much as I can. It was a great birthday. Lots of work…but lots of fun.

Monday, July 9, 2012

Homemade Chalkboard Paint


When I share craft ideas I try to get right to the point (hey...you’re busy, I’m busy…) So here we go:


*Added notes for any who may still have some have questions:
·    
  •  Yes, you can use latex paint (think wall murals *squeeh*)
  •        No, you do not have to prime items first.
  • ·       Yes, this is for a small batch and so can be doubled…tripled…depending on your project size.
  • ·       No, you do NOT have to sand after final coat. If you do, use 150grit sandpaper.
  • ·       Yes, you can use magnetic paint UNDER this and it will still allow both to work properly.
  • ·       No, there is NO color off limit (although light colors may not show chalk well).

Enjoy!! Have fun!! Create!!